

To make these scrummy cakes, you will only need a few ingredients (plus spoons and knives):

- A pack of 12 fairy cakes (or you can make your own) - Seedless raspberry jam - Strawberry flavour frosting (you can make your own of this too if you're better than me) - white chocolate stars (or other decorations of your choice - I just think the stars look cute)
The first thing you'll need to do is to cut little holes into each individual cake. I found it easier to cut them all at once rather than to cut them, fill them, ice them and repeat on another cake. Just get a knife and take it in a circle in the middle of the cake. Make sure you don't make it too shallow, but mostly, make sure you don't make it too deep. If you make it too deep the jam will go everywhere.

Once you've done this step, remove the circle from the cake and place it to the side. Take about a teaspoon full of the raspberry jam, fill the hole (no intended euphemism).

Place the circle back on over the top of the jam. It will look slightly raised and you should be able to see some of the jam, but that's fine. We'll cover this with icing later, so it doesn't matter how neat it is. Just try to keep the amount of crumbs on the cakes to the minimum otherwise you'll get crumby icing.

Now they're ready to be iced! Take the frosting with a knife and spread a slightly thick layer on the cake, just to cover up the holey, jammy mess. Then, take a larger bit of icing and spread it to make the icing a bit more 'cupcake-like'. I'm sure you don't need me to teach you how to ice cakes.

As you can see, because I bought the cakes ready made, the cases were flimsy and were coming away from the cake by this point and looked horrendously messy. You can either remove the cases now or wait until after you've decorated the cakes. I, personally waited until I'd finished. Now take your decorations and strategically place them on the cupcake.

I don't know why I chose this cupcake to photograph as it was probably the worst one! I quite like the messiness of some cupcakes though, I think it adds to their charm. Remove the cake cases (if you didn't do so earlier) et voila!
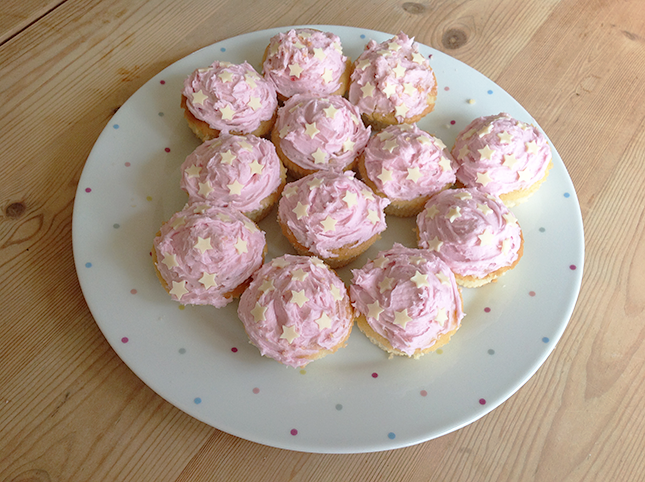
I wish I had some edible pink glitter to sprinkle on these but I think they look okay as they are. These actually tasted really good when I tried them! I actually don't like shop made cakes that much, so I would have liked them a lot more if they were home made but I really didn't have the time to make them today.
I know this was a really simple recipe post, but I wanted to start practising taking pictures and sorting it all out with a simple one than to go straight in at the deep end and try a more complex recipe.
Did you like this recipe post? Would you like to see more?

They look so cute not to mention delicious, I love these kind of posts so I would love to see more :)
ReplyDeletehttp://wwwclairabelle.blogspot.co.uk/
Thank you!
DeleteThey look delicious!
ReplyDeleteElise ♥
They were!
Delete